WHERE DID YOU START AND WHAT DID YOU DO?

IT STARTED WITH THE BRICK
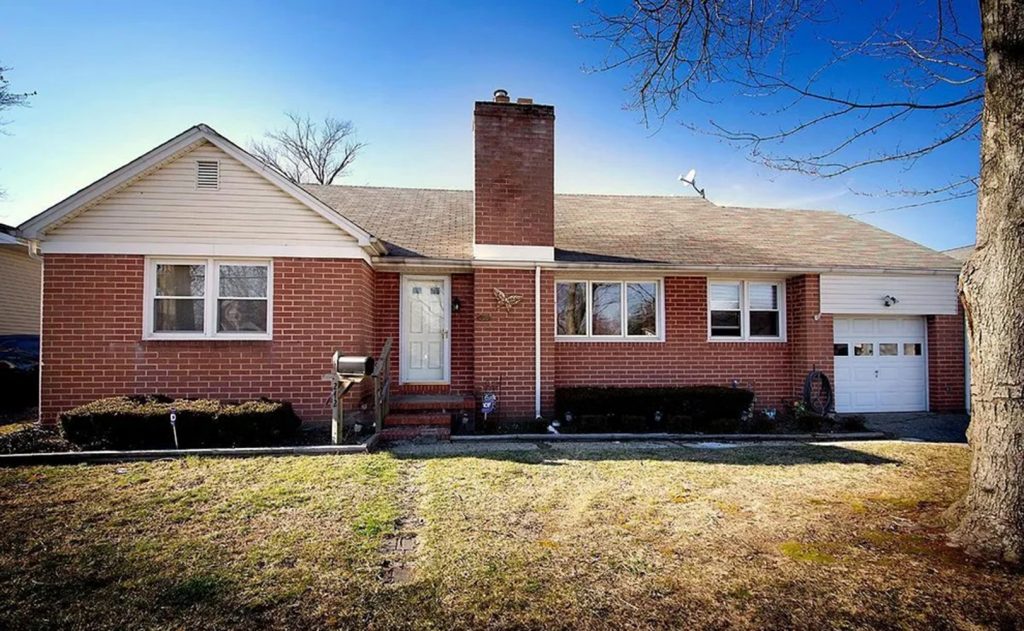
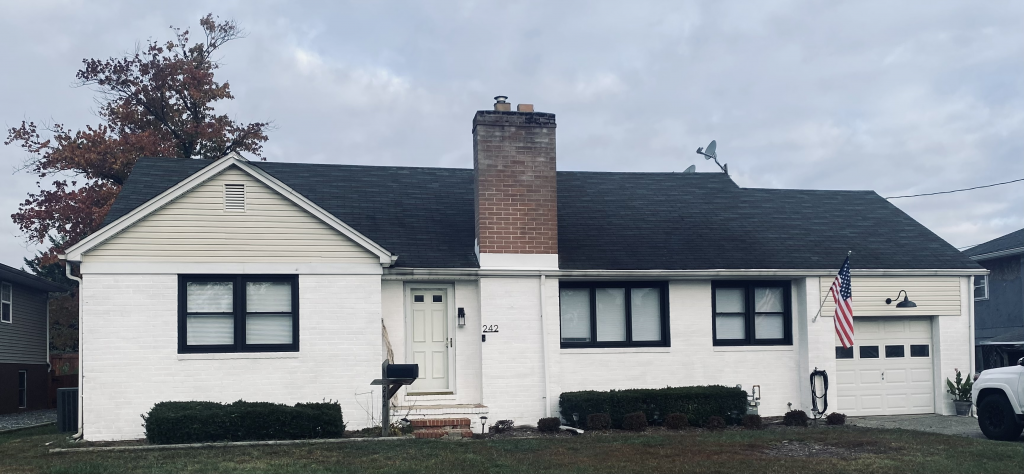
Our house is/was ugly. We know it, you know it. The whole neighborhood knows it. And making an ugly house pretty isn’t as easy as a snap of some fingers. Unfortunately, anything outside is square footage and WORK.
Will & I made an executive decision that we were going to paint our brick. Originally, we wanted gray, but after researching, we went with white. More specifically… Bianco white. And not paint but Limewash.
Here’s how we decided on limewash.
- It actually “limes” the brick – adhering to the stone surface vs paint simply coating – which leads to a much longer lifespan, and even as the brick ages and the lime bonds, it will “patina” more.
- The amount of limewash required to do this job is about half that of a quality exterior paint. Additionally, limewash applies wonderfully with the right masonry brush and a good dilution ratio for the “color” you want.
- You can, with lots of effort – power wash limewash off – if you change your mind.
- You only need one coat (usually)!!!
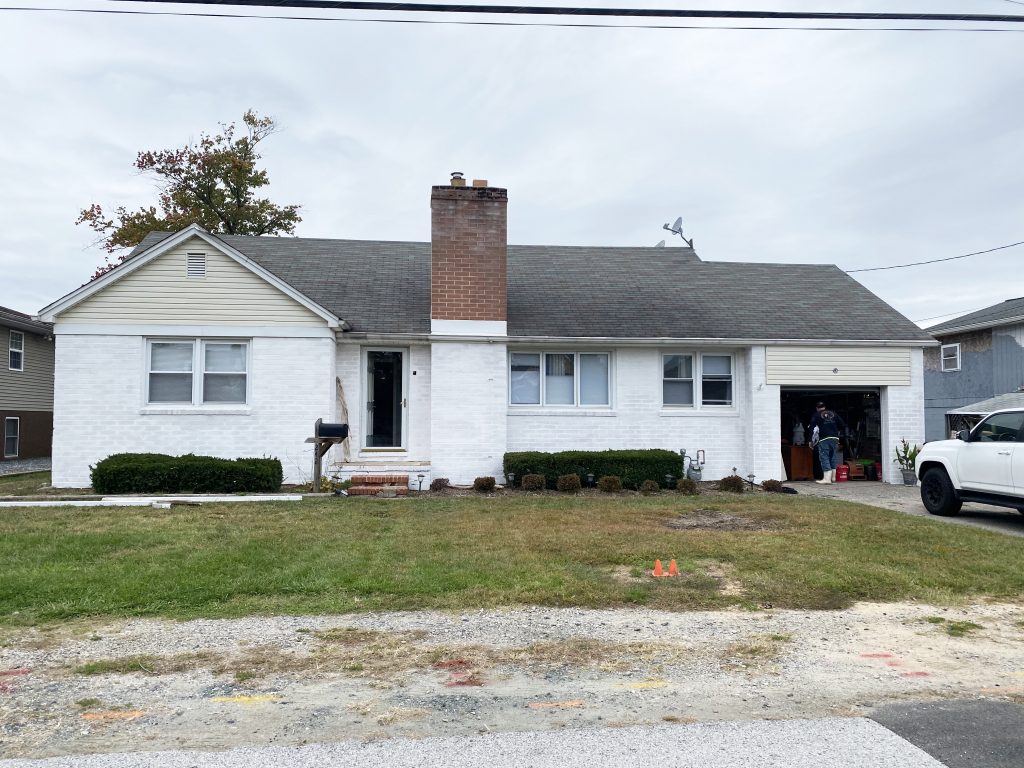
We picked Romabio’s Classico Limewash in Bianco white. (Classico Limewash | Romabio ) We originally procured a sample size and tested a square on our house – and loved it. So, we purchased two 4-gallon buckets that we’ve used to limewash ALL of the front and sides of our house. We are still working on the back, as we hit winter before we could finish. The say that fall is a bit of a better time to apply your limewash because you really want a wet surface – and the summer heat and direct sun, dry your paint surface really quickly. Fall or early spring are the perfect times. So, we are resuming this project as soon as spring comes. But the front of our house is done and we’re only missing the backside.
We did buy the Romabio Masonry brushes and it did make our lives super easy – but painting your house is never actually “easy”. These brushes just make the limewash go on butter smooth and the little bristles poke up into all the roughness of the brick – for solid coverage.
WHAT DID WE DO?
- Walked around and filled any cracks, holes or major chunks missing using cement caulk. Let this dry for a few days.
- Removed gutters and anything attached to the house, we removed our lights and anything else that we didn’t want to “paint around”
- Power washed the crap out of the outside of our house! Beware, power is necessary but don’t make my mistake by spraying brick particles off. A good solid power wash to clear out build up and create some texture for the limewash to adhere is plenty.
- We mixed our limewash with water in separate buckets – to be honest, this is the hardest part to perfect because no matter how exact you think you are with measuring – it never feels right. If you want the European look of limewash, you’ll want a more diluted wash.
- For us, we wanted bright white – so we diluted a bit less than the instructions advised us – this was to ensure we wouldn’t need to do a second coat. It took us a little bit to get it right.
- The first day we limewashed, it was kinda muggy and sprinkling outside so we also noticed we maybe even too heavily coated a part of our house because when the limewash is wet it’s gray and semi translucent almost. Making it look like it has poor coverage. As it dried out – we saw a stunning BRIGHT white. But this wasn’t until the next day when the rain stopped.
- We painted, and painted, and hosed our brick and painted more.
HOLD UP WAIT A SECOND WHAT ELSE DID YOU PAINT?
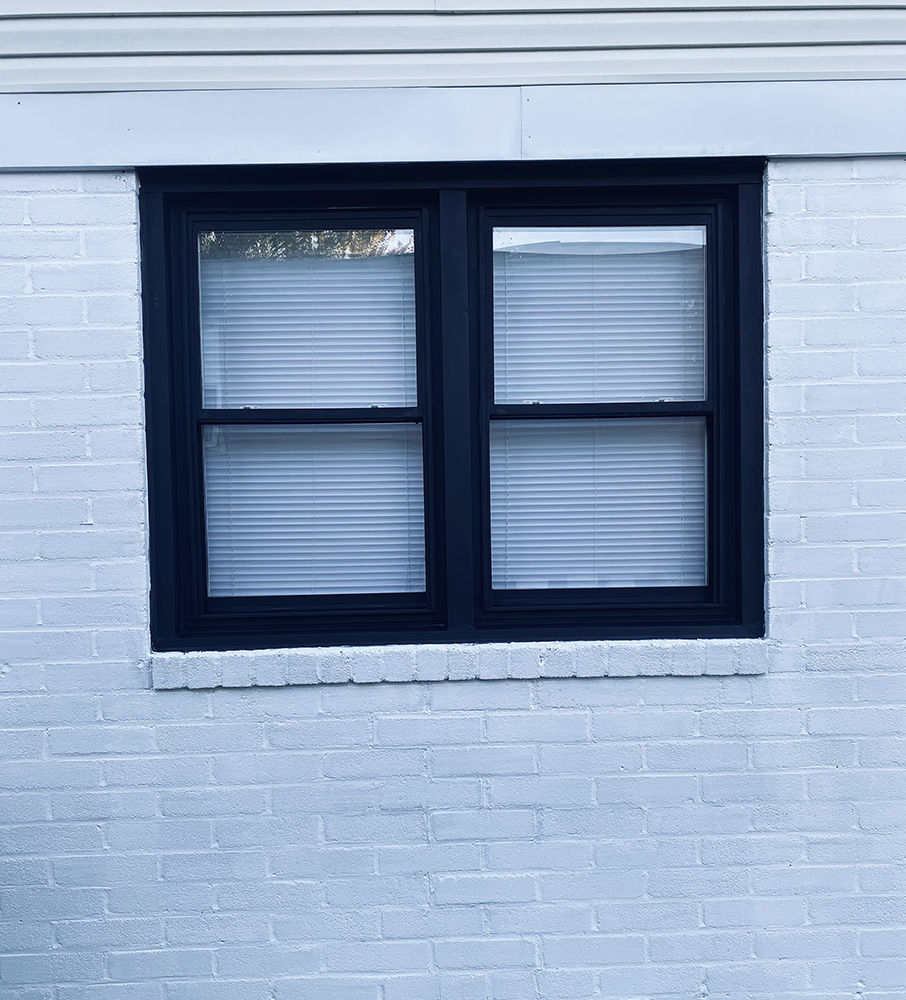
After the front was done, we painted our lower-level windows black using matte spray paint.
I know, I know… it’s not exactly the “best” way to get the black window look but we’re not ready to do windows yet, as we have some other urgent outside items to address first but we KNEW we wanted the black look. After some research, the only negative we had found about using spray paint is that it fades overtime – good news is we only need it to sustain until we’re ready to commit to buying our new black exterior windows. So, Will taped all the windows off (quite flawlessly, I might add), and he sprayed and spray and sprayed. We ended up using an entire can for each window we did – and our larger window used up more. It gave our house front the black edges we needed to stop this WHITE BRICK from washing us out.
We also sprayed our hose holders matte black too.
Eventually, I will take off our storm door, and I sand and TSP it – the previous owners had made the mistake of leaving the protective film on the front and it is BAKED onto the white. I need a smooth surface before I can paint, so that’s going to be a project for when the weather warms up.
HOLD UP WAIT A SECOND WHAT ELSE DID YOU PAINT?
OKOK! I’ll admit it. We didn’t paint our gutters OR our siding, or anymore of the metal on our house… We had a roofing, siding, and gutter company remodel the rest of our house.
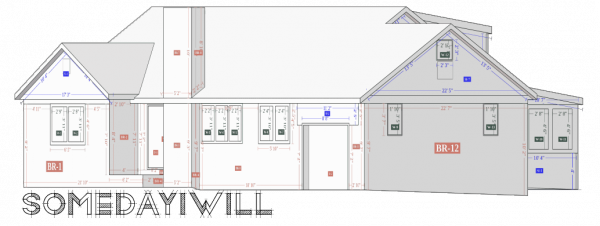
Will is great at MANY things – but we leave some things up to the professionals. We had an amazing local company come and estimate our new roof, new siding, black wrapped metal fascia and soffit, and black gutters and as I write this – they are in the middle of install. We ordered vertical board and batten siding for our A Frames, and we’re doing standard horizontal regular siding for the rest of our house in Midnight Blue. If you are Maryland based – this company is phenomenal, and I cannot give them enough praise. The quote process was in-depth and thorough, we even got neat little 3-D drawings of our house and its measurements. The line-by-line estimate of costs was easy to read and understand.
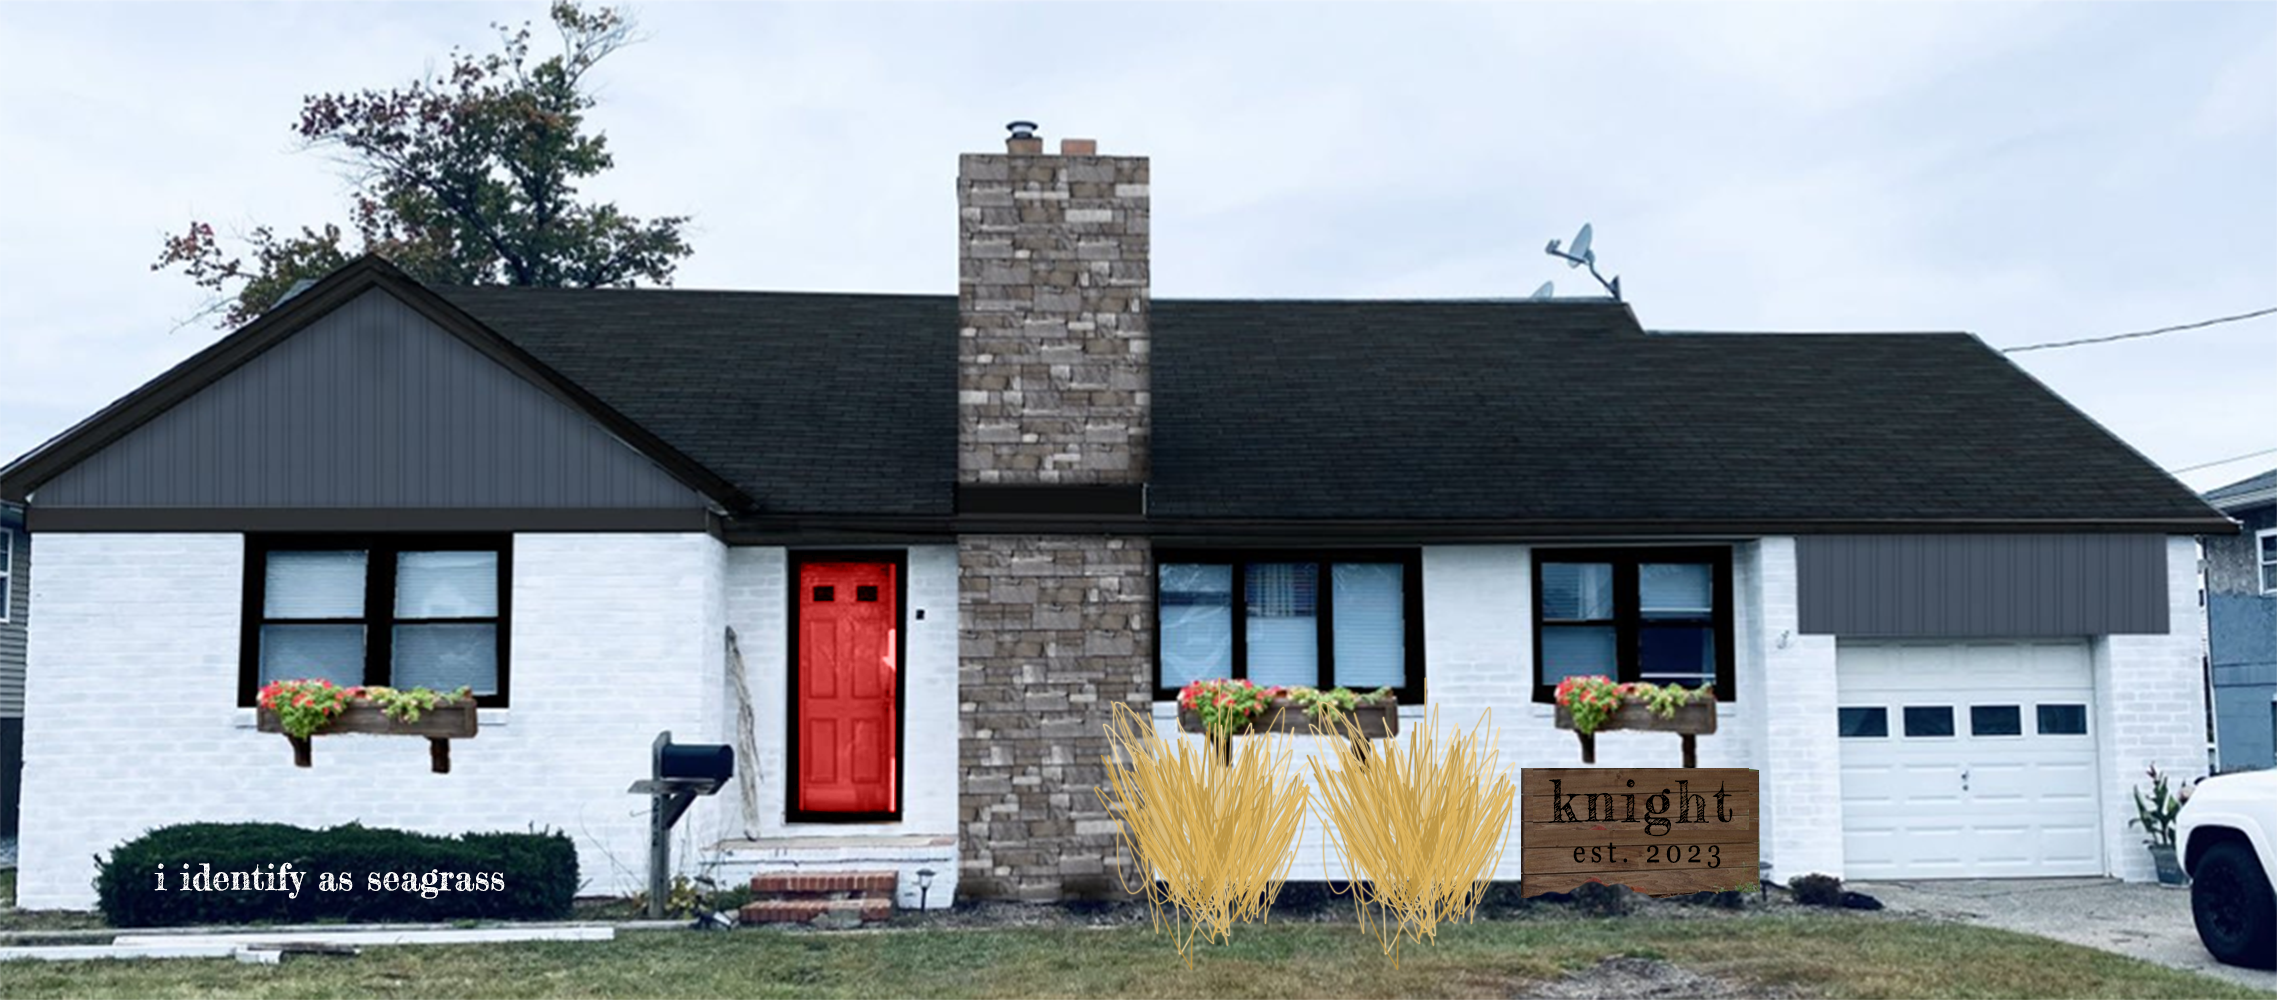
The offer financing!! We were able to get a great rate on the entire project and when we’re done, the outside of our house will match our “photoshopped” version we have been trying to attain since we moved in.
Installation was so flawless – they even ran into some issues and were on top of getting our roof put on right. (Look for the post that explains what happened for us to NEED the new roof… it’s fun.)
WHAT ELSE DID YOU PAINT?

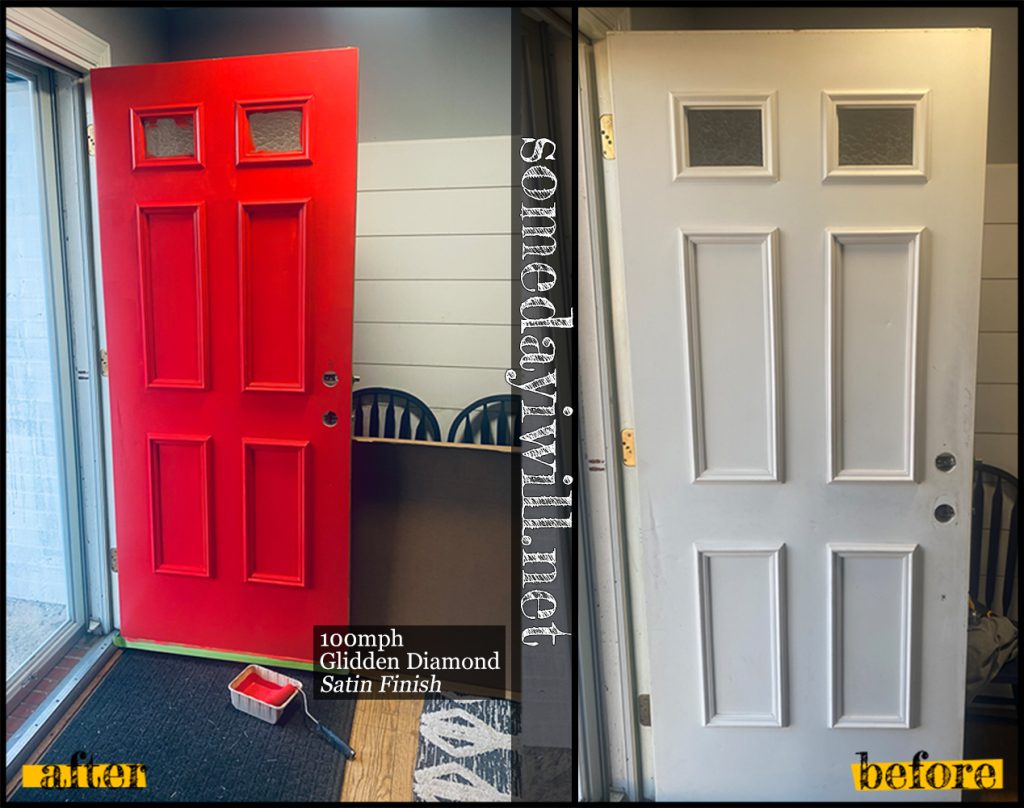
OK!! I have to stop us right here – because this door project SURPASSED ALL OF MY EXPECTATIONS by 1 million percent. This red is unstoppable, it’s fierce, it’s the perfect shade – not to burgundy… not to orange.
The color? 100 mph from Behr (exterior) and we painted the interior with 100pmh mixed as glidden diamond. I wish we could afford a new craftsman style door, but we have a strange door size, and in order to fit a standard door – we’re going to have to change the frame size. or custom order an 83″ door which is not in the budget. So, we went all in and just rolled the door with a smooth roller after cleaning it up. Unfortunately, I didn’t think it had any hope of even making it through the paint. Let alone coming out looking like a fabulous door. I would have prepped a bit better if I had known what a bombshell my new front door would be. As you can see, I was sloppy at the little peep windows because I am going to start yet another DIY project and make a pair of stained-glass mosaics to pop in there later.
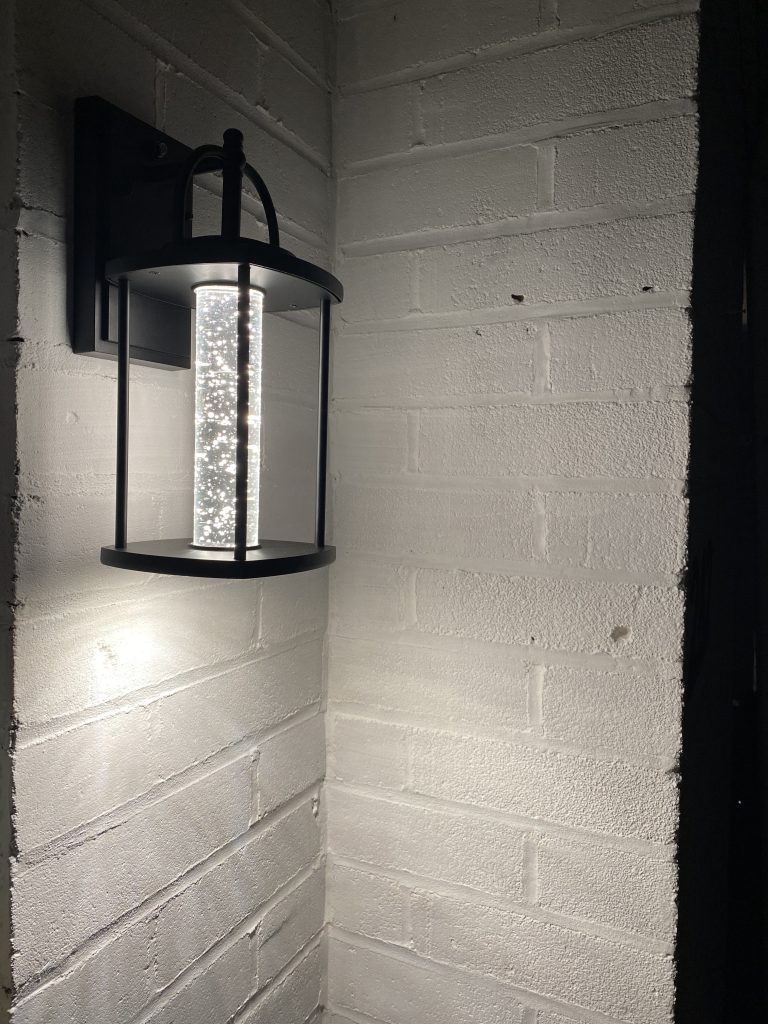
On the outside, we also replaced our motion door light, and over garage lights with something more modern. I ABSOLUTELY LOVE the light I picked for our door. I only wish we had the space for a second one without it looking awkward.
HOLD UP WHAT ELSE DO YOU WANT TO PAINT?
I want veneer stone on our fake/real chimney – it’s not paint, but it’s a color change.
We want to design and stain a wood panel that hides our gas meter..
and we need to landscape out these awful bushes and get some hardy seagrass to support our “nautical” looking house.
LINKS FOR THE PRODUCTS FEATURED:
Door Light: Dusk to Down Outdoor Wall Light – Bubble Glass
Garage Light: Hampton Bay 1- Light Black Outdoor Wall Sconce
Limewash: Romabio Limewash
Romabio Brush: Romabio Masonry Brush
Kwikset Prague Exterior Handle
SomedayIWill is a participant in the Amazon Services LLC Associates Program, an affiliate advertising program designed to provide a means for sites to earn advertising fees by advertising and linking to Amazon.com.

