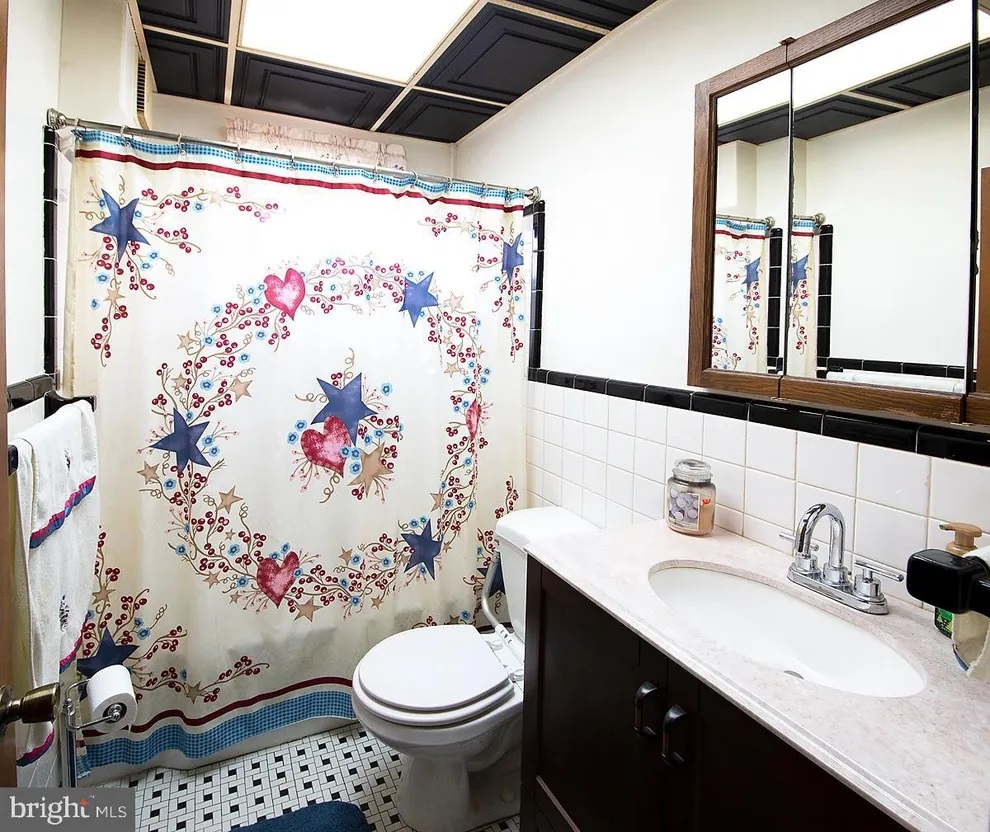
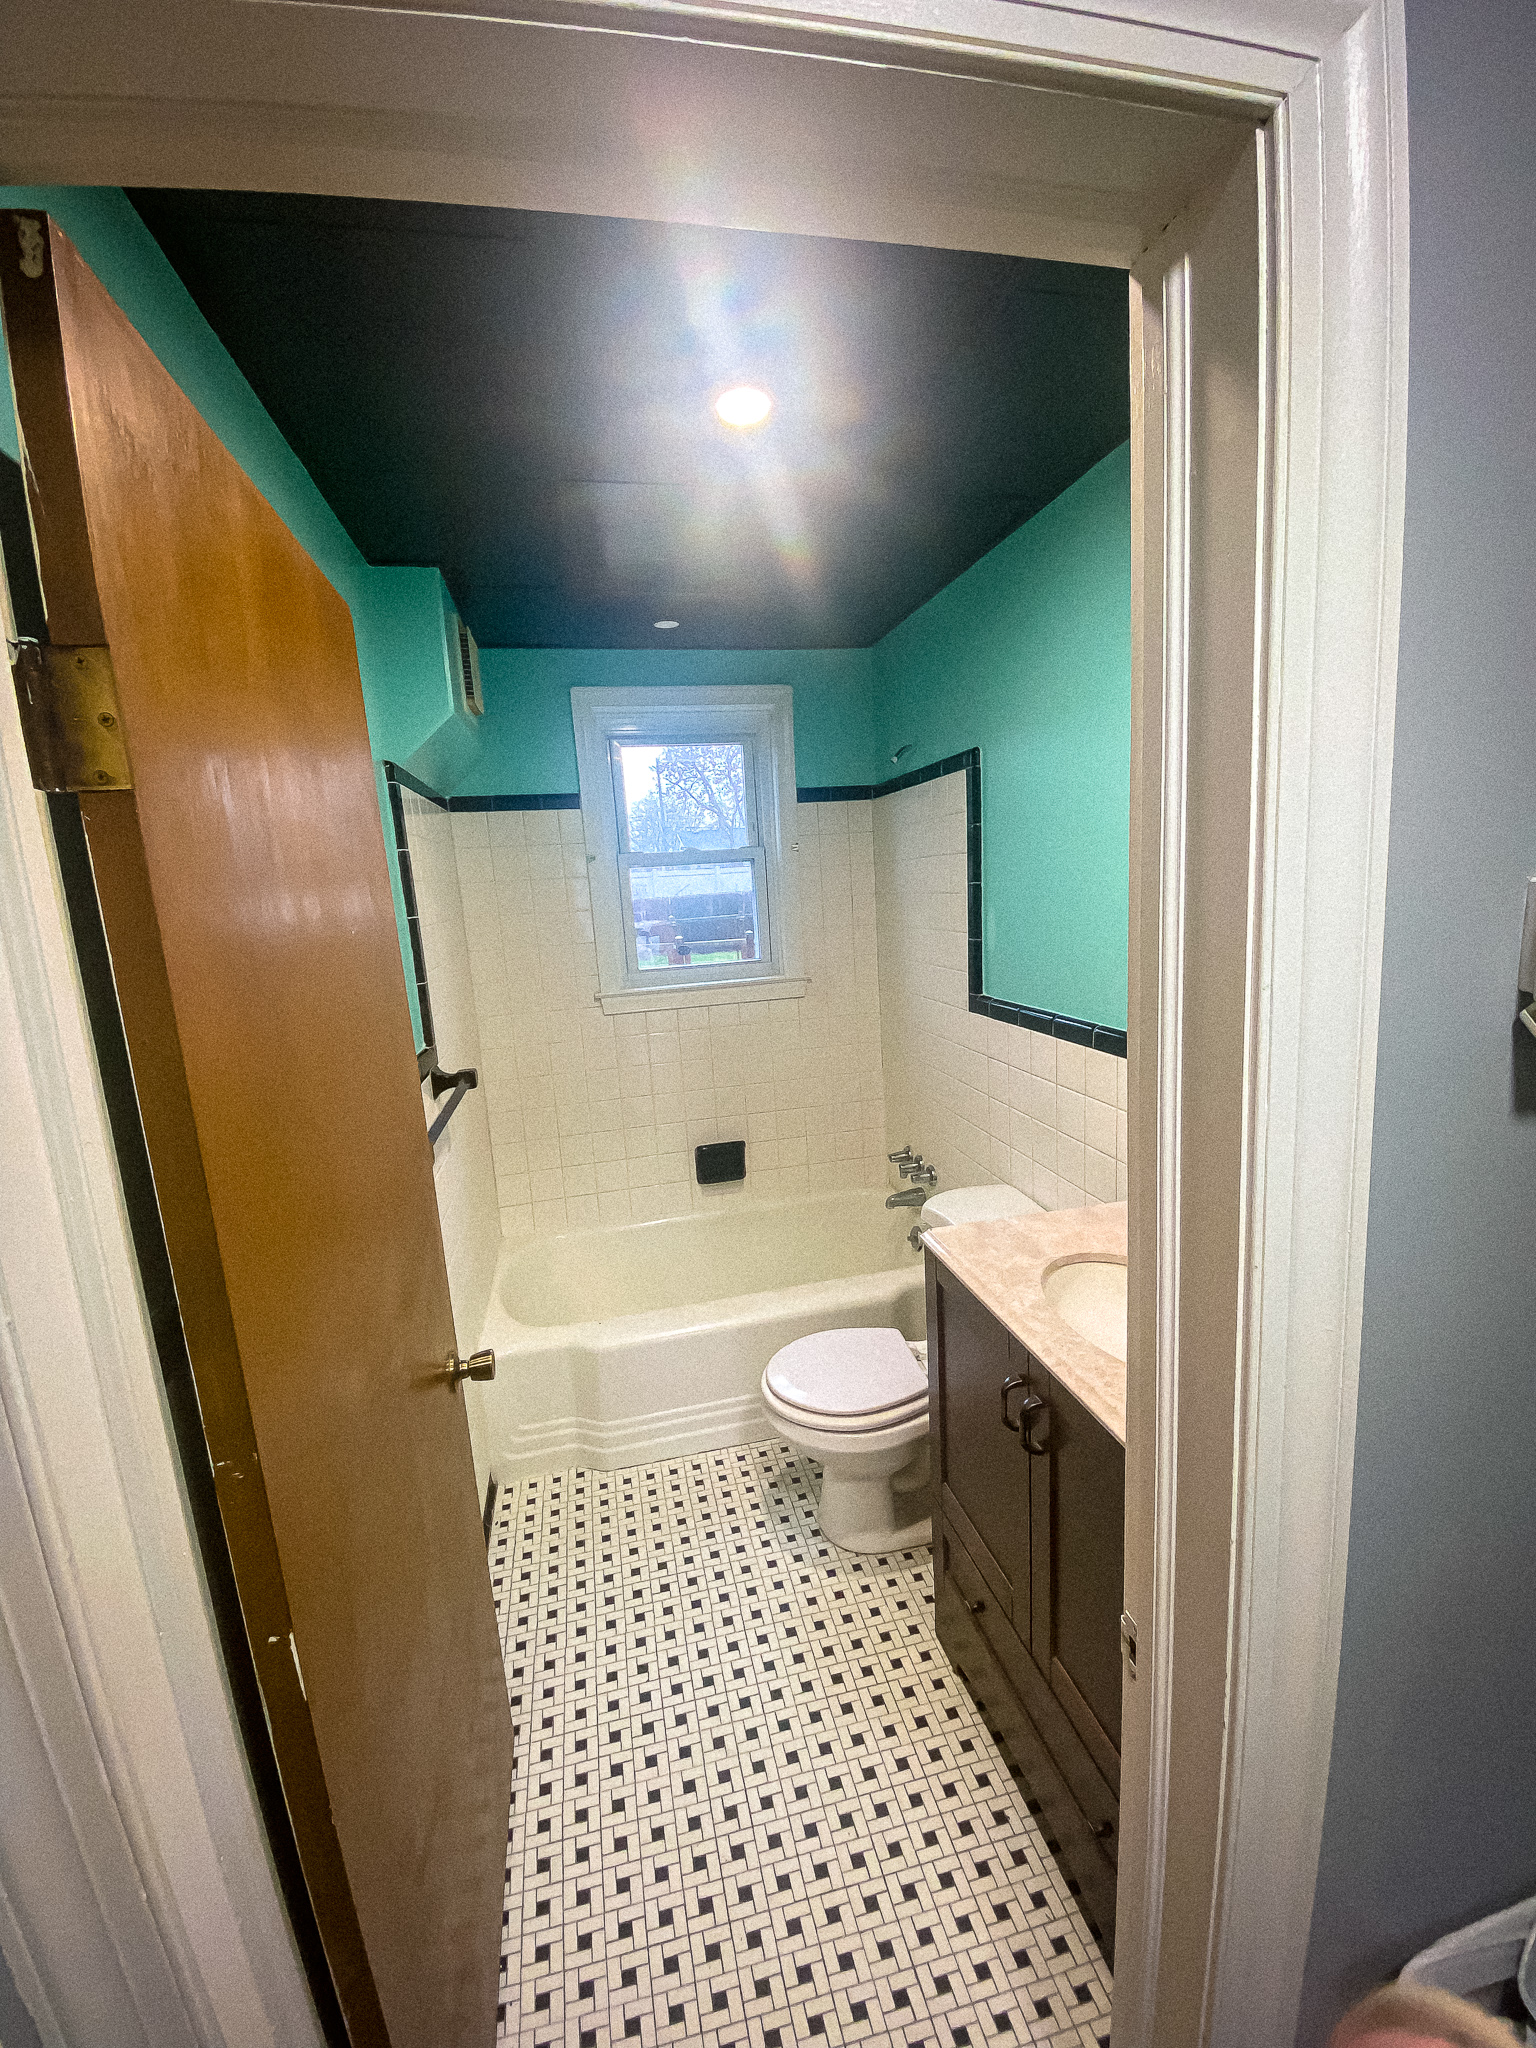
This is probably my favorite design/project yet. We moved in – and one of the first things I noticed was how uncomfortable the bathroom made me. I wasn’t sure if it was the unaddressed retro aspect of the tile, the old tub that had lost it’s shine, or maybe it was just because white tile just always looks dirty no matter how much you clean it. There were some ferociously grimy parts of this particular bathroom. The first one being that the entire vanity and medicine cabinet smelled musty and a bit like urine.
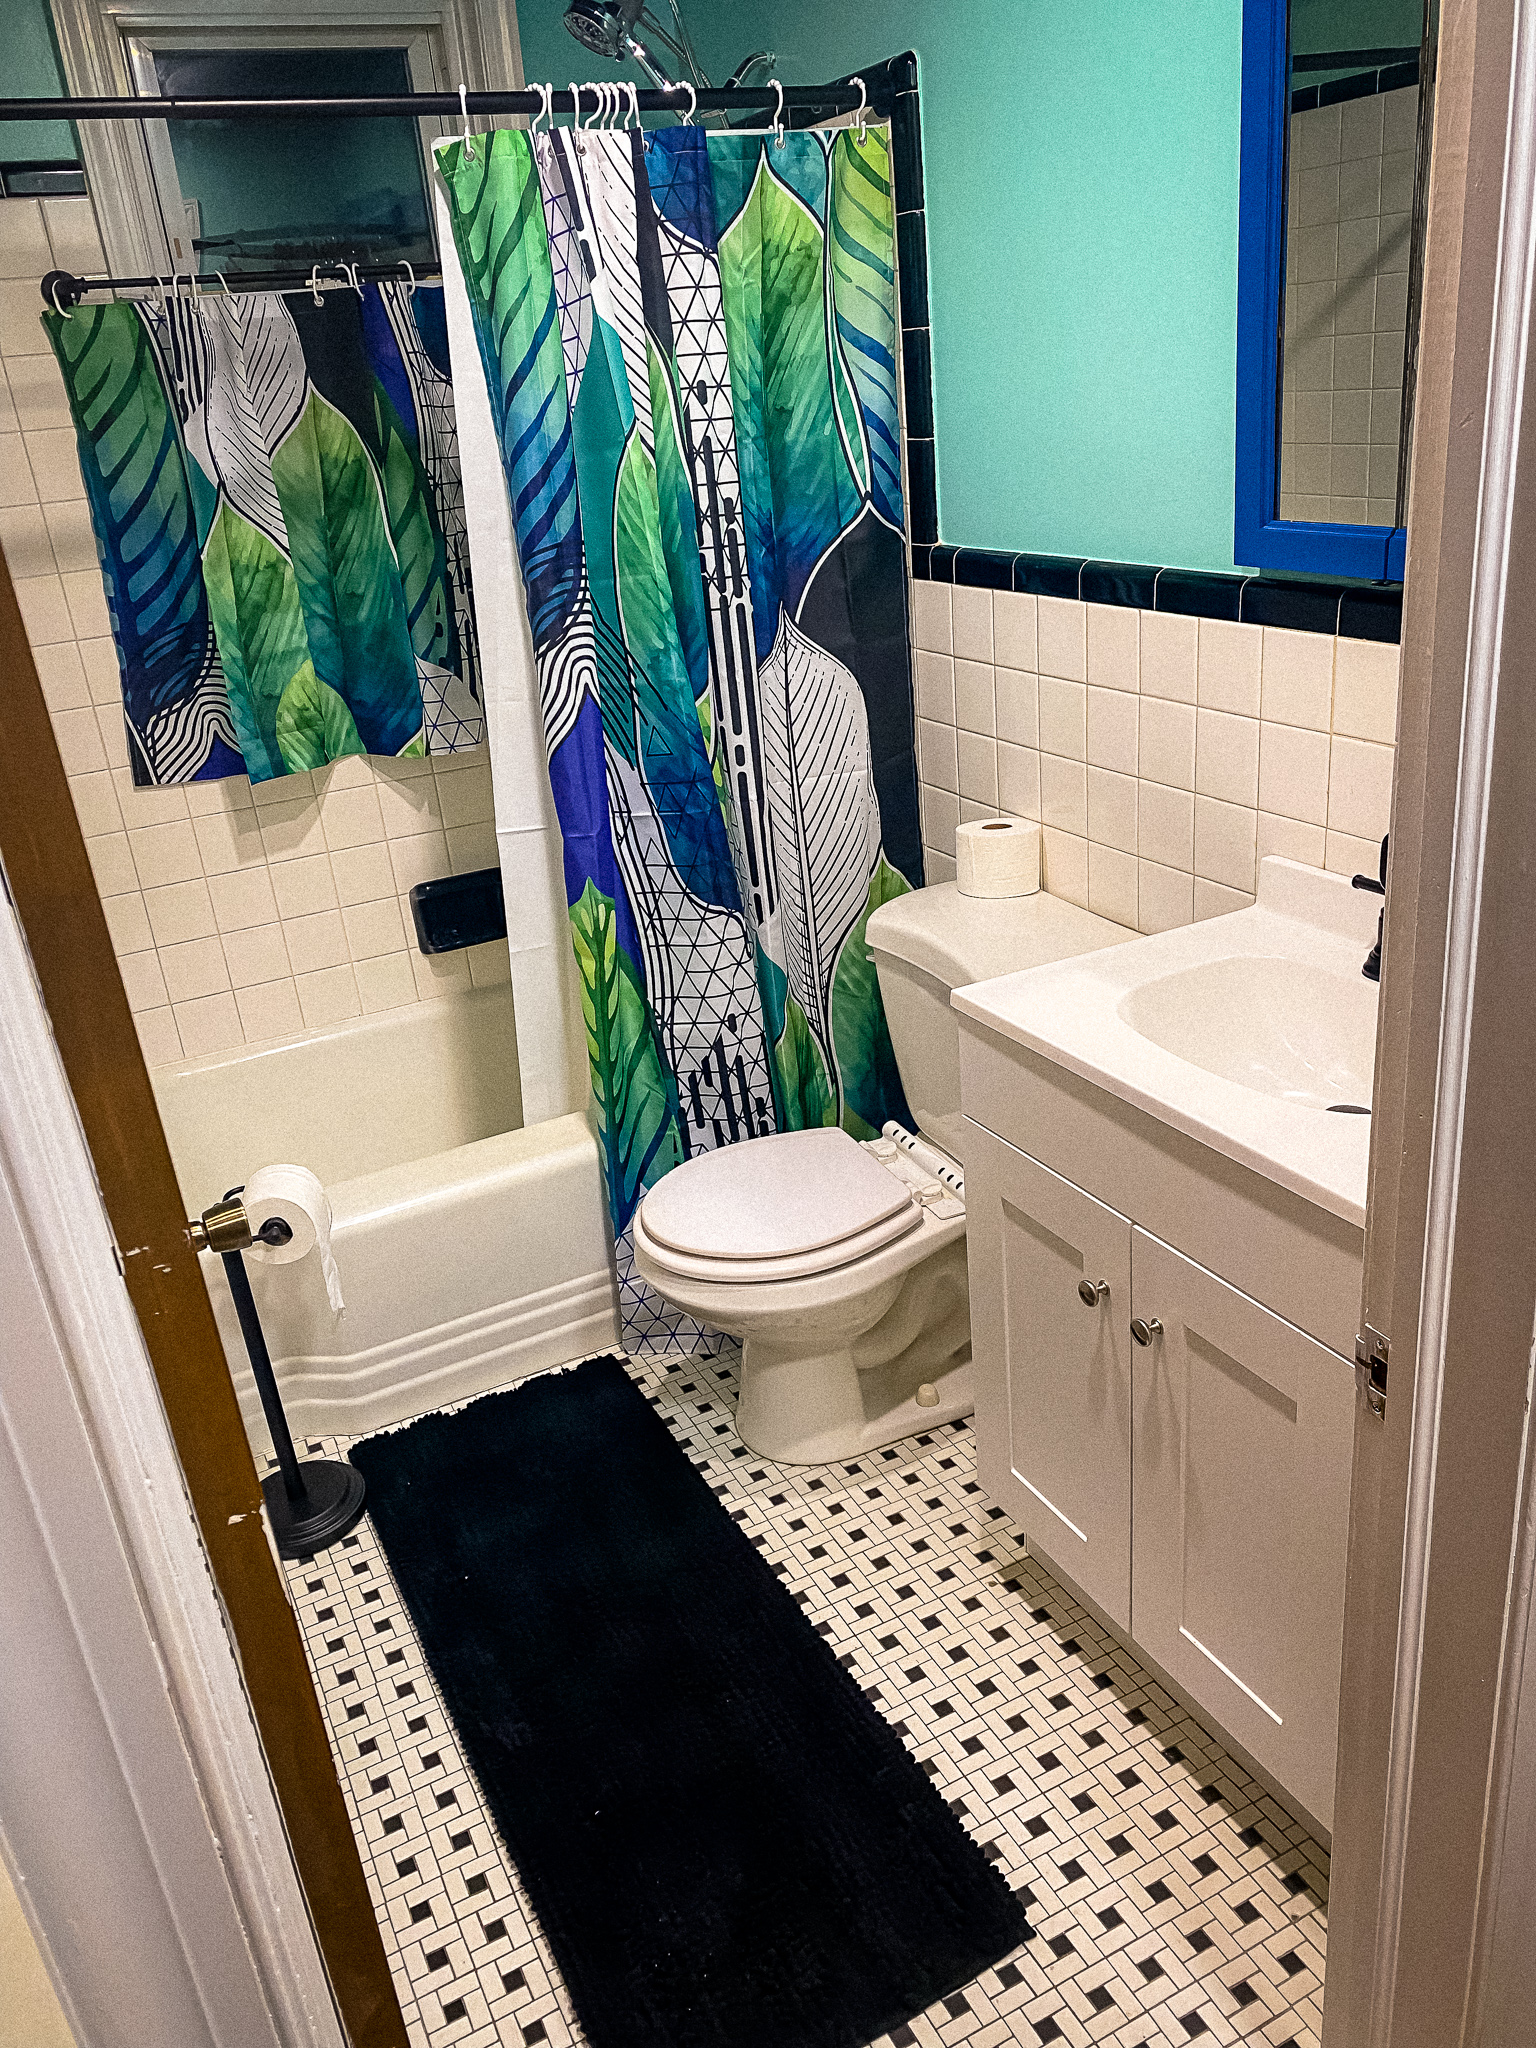
With that being said – I knew we didn’t have it in the budget for an entire bathroom overhaul, so I was going to need to make the retro tile work in a bathroom that we could be proud of. After all, all of the people we’ll be having over to help us work on the house – having a dirty bathroom is embarrassing. I started the entire process with the biggest ‘no-no’ ever. I built the entire plan off of the shower curtain. Which I SCOURED amazon for. The black geometric elements of this curtain are what prompted me to match it with the retro black/white tile scheme in our 1950’s built house. I knew I could then use the vibrant colors in the curtain to pull away from the age of the bathroom tiles/tub. But also, allow for it to be “organic”.
LINK: SHENGJUN Abstract Plant Shower Curtain
I bought two of them – because as you can see, we have the infamous “shower window” and we were going to need something to prevent water from constantly hitting the window. In the before of this bathroom there’s an entire window treatment utilizing a cut shower curtain – so I imitated what I saw.
I really wish I taken more “in process” photos because this transformation is incredible.
WHAT DID WE DO?
- I scrubbed the dickens out of all of the tile and grout.
- we pulled down the retro insulated tile, since the actual drywall ceiling was in rough shape – we elected to put a drop ceiling back in.
- We painted the metal drop ceiling “frame” with oil based black paint. This sticks and covers on metal better than latex. A metal drop ceiling frame in a bathroom will 100% rust, hopefully we do a remodel before we see it come back.
- We cut removed the large industrial fluorescent tube light fixture – and replaced a single bracket of the ceiling frame that we got from a room we demo’ed in the basement.
- We measured and cut replacement “tiles” out of thinner drywall.
- We measured and cut 3 holes for recessed lighting.
- We painted the drywall tiles with the same oil based black paint. It took a bit longer to dry but it matched the frame perfectly.
- We wired in the new lights…
- One switch that turned on just the exhaust fan previously (that bump on the wall in the shower.) now turns on a single light above the shower along with it.
- Two lights are placed centrally in the bathroom over the vanity/toilet area.
- We carefully placed the tiles back in.
- Voila – Ceiling complete.
- We selected a classic, airy and fun wall paint color that would distract you from the tile condition – Sherwin Williams SW6758 ‘Aqueduct’ and we painted above the tile on all the walls. We were able to use just a quart of this paint and do two coats with just a bit leftover for any small accent paint jobs or future repairs.
THE MEDICINE CABINET
- We pulled the medicine cabinet out of the wall (it’s recessed). THIS THING IS HEAVY – it’s all metal, except for the wood trim.
- The original plan was to replace it – but it was an awkward size, and we didn’t want to spend money on a vanity we’d replace. So, I was able to repurpose the entire thing.
- I removed the 3 doors
- Cleaned the entire piece with warm water & TSP & scrub sponges
- Once dried – I taped off the wood portion that you can see in the “before” photo.
- I sprayed the backside of the doors with white gloss spray paint.
- I sprayed the entire inside and outer edge of the entire medicine cabinet with gloss black spray paint.
- (while I did this, I also sprayed the vent cover in a matte black, and the free standing toilet paper holder). You can’t tell, but it’s down there.
- I was extremely careful not to let it run by doing soft, light layers – letting it get tacky and then layering more.
- This project took the entire can of gloss spray paint.
- I removed the taped off wood – and painted with a semi-gloss sample of Behr [PAINT COLOR] and I added a small amount of Floetrol to the sample to get rid of my brush strokes.
- We reattached the doors and inserted the medicine cabinet back in.
- The original plan was to replace it – but it was an awkward size, and we didn’t want to spend money on a vanity we’d replace. So, I was able to repurpose the entire thing.
FINISHING UP
- We did buy a new (project source/cheaper) vanity and a faucet. Unfortunately, the faucet from the previous vanity was broken, so we just figured we could spend a bit of money. The good news is, we got a swanky black glacier bay faucet that really added some spark to this project. We went with a smaller vanity in the hall bathroom as this house has 4 bathrooms in total – therefore, we will have plenty of personal storage in other bathrooms eventually. This made the bathroom really feel so much bigger. I would have preferred a pedestal sink, which we had given to us as a hand-me-down, however after we removed the old vanity we realized how bad the tile/wall damage was and a pedestal sink would expose far too much of the tile damage without tile repair. Which we could have done, but it wasn’t worth the effort/time for something we may not keep.
- We drilled a standard indoor/outdoor curtain rod into the grout lines midway up the window to protect it from direct water damage – but continue to let natural light into the bathroom. I do regret using a wrap around rod – while it LOOKS beautiful, from a functionality standpoint it takes away too much “shower space” and it makes it feel a bit cramped. We’ve been able to counteract this by moving the shower curtain rod up and out a bit further now that our paint isn’t tacky or sticky and at risk for us peeling it with a tension rod.
- I cut the second shower curtain, and then hemmed the bottom using liquid stitch (because my sewing machine is still in the box, 2 years after I received it) and we hung it as the curtain. I’ll use the remaining shower curtain fabric for some other neat little accents I had ideas for eventually.
LINKS FOR THE PRODUCTS FEATURED:
Vanity Link: Project Source 24″ White Single Vanity
Faucet Link: Glacier Bay Oswell 4 in. Centerset Faucet
Black Lights: 4″ Black Recessed Light
Shower Curtain Rod: BRIOFOX Industrial Tension Rod
Curtain Rod: Kenney Adler Indoor/Outdoor Curtain Rod
(Not Pictured) Gricol Bathroom Shelves Wall Mounted (drilled into the grout – to add in some space)
Shower Head: [LINK]


SomedayIWill is a participant in the Amazon Services LLC Associates Program, an affiliate advertising program designed to provide a means for sites to earn advertising fees by advertising and linking to Amazon.com.


